CS 142 Project 3: Animation Exploration
- Starter code
- Guide to the classes
- Guide to the math
- How to develop the project
- What to turn in
- Challenges
For this project, you will write a program that allows you to model polygons and animations in an object-oriented style. The end result will be a collection of classes that, when put together, allows you to build animations on the screen out of polygons that move in certain ways at certain times, like this:
The final product will be creating the above animation (or something comparable) programmatically, using classes that you design. Along the way you will create other simpler animations.
Starter code
Make sure you create the project in a place on your computer where you can find it! I suggest making a new subfolder in your CS 142 projects folder.
You can download the starter code for this assignment by creating a new IntelliJ project from version control (VCS) and using the following URL:
https://github.com/pkirlin/cs142-f22-proj3
Guide to the classes
In this project, you will design a number of classes that represent polygons, groups of polygons, and animations of these polygons. The classes you will write are:
Polygon: A polygon represents a shape drawn with a sequence of connected line segments. Each polygon is defined by a sequence of (x, y) points, and the boundary of the polygon is formed by connecting the points in sequence. For instance, a trianglePolygonwould have three points, a rectangle four, etc. APolygonalso knows what color it is so it can be drawn on the canvas.Polygons also have the ability to be translated and rotated:
A translation is simply changing the location of the polygon; it is shifted a certain amount in the x direction and a certain amount in the y direction. This does not change the polygon’s overall shape, size, or orientation.
A rotation means rotating the polygon around a fixed point, which does not have to be part of the polygon itself. This changes the location of the polygon, but also might change its orientation. Its shape and size are not changed.
ComboPolygon: A “combo polygon” represents a collection ofPolygonobjects that form some combined shape that should be treated as one unit.
They also have the ability to be translated and rotated: when a translation or rotation is applied to aComboPolygonthat operation is simply passed along to eachPolygonthat makes up theComboPolygon.TranslationAnimationandRotationAnimation: These two classes represent a translation or rotation animation applied to a specificComboPolygon. These classes store information about how an animation takes place over time, in that both classes store a time (in milliseconds) that the animation starts, and a time that the animation ends. In this way, one can represent, for instance, a 90-degree rotation that begins at time 1000ms and ends at time 3000ms (for an animation that lasts 2 seconds in total).AnimationSequence: This class represents a collection of animations applied to variousComboPolygons. Each animation may be a translation or rotation, and can begin and end at any time. This class is in charge of playing the animations at the appropriate times so they all are timed correctly and animate appropriately.
Guide to the math
This project requires some understanding of translations and rotations in geometry and how they are applied to a polygon.
Translations are straightforward. A translation means moving every point in a polygon a fixed distance in the x direction, and a fixed distance in the y direction. The distances in the x and y directions need not be the same, and they may be zero (for instance, to shift the polygon perfectly left, right, up or down).
Mathematically, just add the translation’s x distance and y distance to each point in the polygon. Note that in computer graphics, the y-axis is “flipped”, so a translation of 10 in the y-direction increases all the y coordinates in the polygon by 10, and therefore moves the polygon down the screen.
Rotations are more complicated. Our rotations are defined by an angle measured in degrees, along with an (x, y) point that we will rotate around. The point is required information because rotating, for instance, a square 90 degrees around its center point does not change the square in any visible way (see the red square below), but rotating the same square around one of its corners shifts its location on the screen (see the blue square, which is rotating around its lower-left corner).
To rotate a polygon around a point, we will apply the steps below to each point of the polygon. To rotate a point of a polygon \((x, y)\) around another point \((a, b)\) by some angle \(t\), do the following:
- Assuming the angle \(t\) is in degrees, is must be converted into radians. Do this by multiplying \(t\) by \(\pi/180\).
- Translate \((x, y)\) by \((-a, -b)\). That is, subtract \(a\) from \(x\) and \(b\) from \(y\).
- Set \(x_2 = x \cdot \cos(t) - y \cdot \sin(t)\).
- Set \(y_2 = x \cdot \sin(t) + y \cdot \cos(t)\).
- Translate \((x_2, y_2)\) by \((a, b)\). That is, add \(a\) to \(x_2\) and \(b\) to \(y_2\).
- The new rotated point is \((x_2, y_2)\).
How to develop the project
This project is organized around writing one class at a time and testing it. Unlike previous projects, there is no specific main() method to write; rather there is a file called Tests.java that you will use to write tests for each class as you develop them, and also contains a final animation that should reproduce the video above. The guide below indicates the required tests you must write, but you should feel free to add more!
The Polygon class
This class already has the instance variables and a few methods written for you. The way this class is supposed to work is that the constructor is provided with the number of points the polygon will eventually contain, and the color of the polygon. However, the actual coordinates of the points aren’t provided in the constructor, they will be added through calling the addPoints() function.
Note: The points of a polygon are represented here as doubles, even though we will only ever have use integer coordinates. The reason for this is that when we start animating the polygons, it is possible that the translation and rotation math will require some polygons to temporarily be placed at non-integer coordinates, so therefore we just store all points as doubles.
Example usage of this class:
Polygon rectangle = new Polygon(4, Color.RED);
rectangle.addPoint(100, 100);
rectangle.addPoint(200, 100);
rectangle.addPoint(200, 300);
rectangle.addPoint(100, 300);
Because we are storing the x and y coordinates in arrays, when a new point is added to the polygon, we have to know what index in these arrays the point should go into. This is maintained through the nextIndex variable. Notice how in the constructor, nextIndex is initialized to zero. Whenever addPoint() is called, it should place the new x and y coordinates (that it is given as parameters) into the xpoints and ypoints arrays at the index nextIndex. Then it should increment nextIndex so that the next call to addPoint() will put its points into the array one index to the right. You do not have to check for addPoints() being called too many times, though you may.
Suggested order of writing methods
Before writing any methods, familiarize yourself with the instance variables of the class and envision how the methods will work with them. Note that the constructor and the drawOn() method are already written for you.
addPoint(): Write this first. This method takes a new (x, y) point to add to the polygon.toString(): Write this next. This method should return aStringstarting with the wordPolygon:, and then be followed by all the points of the polygon.
You can include the color of the Polygon if you want. Remember, this method should return theString, not print it. Hint: UseArrays.toString()to turn an array into aString.Stop and test. In
Tests.java, runtestPolygons(). This test function creates a red rectangle, prints it out, and displays it on a sample canvas. The polygon’s string representation should be something like:Polygon: [100.0, 200.0, 200.0, 100.0] [100.0, 100.0, 300.0, 300.0]The canvas should look like this:
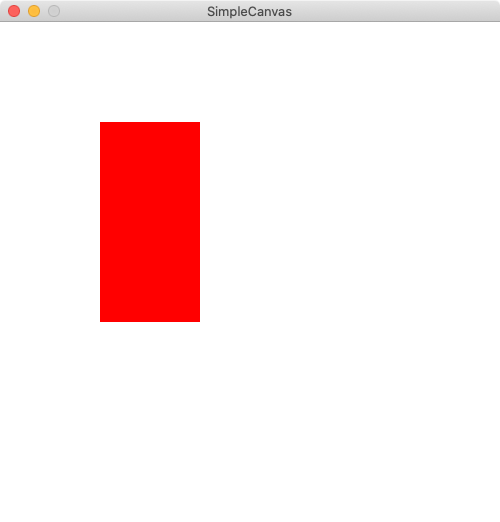
Then, create a second polygon in the test function, print it out, and draw it on the canvas. Verify that it is printed and drawn correctly.
translate(): Write this next. This method takes twodoubles,distxanddisty, and should translate the polygon by these distances in the x and y directions. Note: This has nothing to do with the animations; these translations should happen “instantly” when the method is called.Stop and test. In
Tests.java, comment out the call totestPolygons()inmain(), and uncomment the call totestTranslation()This test function creates a red rectangle, prints it out, then translates it twice, and prints it out after each translation. The output should be:Polygon: [100.0, 200.0, 200.0, 100.0] [100.0, 100.0, 300.0, 300.0] Polygon: [110.0, 210.0, 210.0, 110.0] [120.0, 120.0, 320.0, 320.0] Polygon: [80.0, 180.0, 180.0, 80.0] [80.0, 80.0, 280.0, 280.0]The test function also asks you to create a second polygon and test its translation.
rotateAround(): Write this next. This method takes a point and an angle (in degrees) and should rotate the polygon around the given point by the specified number of degrees. Follow the math above to write this method, adjusting each point of the polygon.Note that if
degreesis positive, the rotation is clockwise, and if its negative, the rotation is counter-clockwise. (This happens automatically with the math, you don’t have to do anything special for this.)Stop and test. In
Tests.java, write a function calledtestRotations()that works similarly totestTranslations(). You should create a polygon and rotate it a few times, and verify the rotations work as they should. You can make up examples or find some online (there are lots of videos that walk through the math, and you can use their examples if you don’t want to make up your own.)An alternate way to test is to test the rotations on a canvas. In your testRotations() function, you can create a polygon, display it on a canvas with
drawOn(), wait for a mouse click (or pause the canvas), rotate the polygon, then re-display it on the same canvas with another call todrawOn(). Don’t forget to call update() on the canvas after the rotation to get the picture to change.
You can also callclear()on the canvas to erase it before displaying the rotation, or leave it out to display the pre-rotation and post-rotation images.
Polygon is now done!
The ComboPolygon class
This class is left mostly blank, but the implementation of a ComboPolygon is very similar to regular Polygons, in that their job is mostly to manage arrays. A Polygon manages two arrays of doubles, while a ComboPolygon will manage a single array of Polygons. Notice how the instance variables in ComboPolygon parallel a few of the instance variables in Polygon, and how similar the constructors are.
Most of the methods in this class simply “pass along” their commands to each individual polygon within the ComboPolygon. For instance, how do you translate a ComboPolygon? You simply call translate with the same arguments on each individual Polygon in the polys array. Same with rotateAround() and drawOn().
Suggested order of writing methods
addPolygon(): Write this first. This method takes a newPolygonto add to the ComboPolygon. This is just likeaddPoint()inPolygon.toString(): Write this next. This method can simply return whateverArrays.toString()returns for thepolysarray. Remember, this method should return theString, not print it.Stop and test. In
Tests.java, runtestComboPolygons(). This test function creates a combination polygon of four differently-colored squares and prints it out. The drawing won’t work yet because we haven’t writtendrawOn(), but if you’ve writtentoString()correctly, you should see something like:ComboPolygon: [Polygon: [140.0, 180.0, 180.0, 140.0] [140.0, 140.0, 180.0, 180.0], Polygon: [180.0, 220.0, 220.0, 180.0] [180.0, 180.0, 220.0, 220.0], Polygon: [180.0, 220.0, 220.0, 180.0] [140.0, 140.0, 180.0, 180.0], Polygon: [140.0, 180.0, 180.0, 140.0] [180.0, 180.0, 220.0, 220.0]]drawOn(): Write this next. Use aforloop to calldrawOn()on each Polygon in the ComboPolygon, passing along the same arguments the method was called with.Stop and test. At this point, you should be able to see the ComboPolygon drawn on the screen while testing.
translate(): Write this next. Use aforloop to calltranslate()on each Polygon in the ComboPolygon, passing along the same arguments the method was called with.Stop and test. In
Tests.java, either add some code intestComboPolygons()to test the translation method, or write a new test function.rotateAround(): Use aforloop to callrotateAround()on each Polygon in the ComboPolygon, passing along the same arguments the method was called with.Stop and test. In
Tests.java, either add some code intestComboPolygons()to test the rotation method, or write a new test function.
ComboPolygon is now done!
The TranslationAnimation class
This class manages an animation of a translation, which is formed by splitting a single translation into pieces that take place over time.
First, a quick tutorial about how animation works. Motion in TV and film is of course, an illusion. Videos that appear to display moving pictures are actually displaying a sequence of images, called “frames,” very quickly in sequence, where each frame contains a still image. By making sure the images differ from each other only minimally, and by only pausing for a fraction of a second while displaying each frame, our eyes interpret the sequence of non-moving images as moving pictures. (More info.)
Typically, our eyes can only perceive 10-12 frames per second as visually distinct, whereas anything faster is perceived as motion. Various video and TV standards typically use somewhere between 24-60 frames per second. (More info.) Our animations, to make the math easier, will use 50 frames per second, which means each frame of our animations will be displayed for 1/50th of a second, which is 20 milliseconds (ms).
Here’s a full example. Suppose we wish to translate the point (100, 100) by 100 pixels in the x direction and 200 pixels in the y direction, and this animation should last 2 seconds (2000ms). (Note that this example uses a single point, but all the math can be extrapolated to apply to a Polygon or ComboPolygon). Because the animation lasts 2000ms, and each frame of the animation will be displayed for 20ms, we know that there are 100 total frames in the animation. Now we have to figure out how much each frame changes from the previous one. To do this, we divide up the total distance of the translation (separately for x and y) over each frame. So the x coordinate is changing by 100 pixels over 100 frames, so the point moves one pixel in the x direction for each frame. Similarly, the y coordinate is changing by 200 pixels over 100 frames, so the point moves two pixels in the y direction for each frame. In this way, the total translation is divided into 100 mini-translations, each one moving the polygon by 1 pixel in the x direction and 2 pixels in the y direction.
All of this information is stored and managed in the TranslationAnimation class. In particular, this class maintains variables to store the total change in the x and y directions, the time the animation starts and ends, and the ComboPolygon the animation is run on. Note that start and end times are used rather than a single “duration” so that later on we can have animations start at different times.
Suggested order of writing methods
Write
advanceToNextFrame()first. This method should calculate the individual x and y distances for one frame of animation and then call your translation function you wrote earlier to make the change.Stop and test: Fill in the testTranslationFrames() test code in Tests.java to test your advanceToNextFrame() method. Code is already written for you that creates a very small test animation that mirrors the example given above. You should add code to advance the ComboPolygon to the next frame a few times, and print it out after each advancement. Make sure the points of the polygon are being translated correctly.
Now write
playOn(). This method displays the full animation, frame by frame, on a canvas. There is pseudocode in the method to follow. There is already a test function written: testTranslationAnimation(). The final result should be this:
The RotationAnimation class
This class mirrors the TranslationAnimation class, but is for rotations instead. Everything from above applies here; the only difference is that instead of having a translation x distance and y distance to divide into a certain number of frames, we have a rotation angle that needs to be divided instead.
So write this class following the model above. When you’re all done, you should be able to run testRotationAnimation() and see the following:
The AnimationSequence class
This class is the last class! It manages a collection of translation and rotation animations, each one running at different times.
Suggested order of writing methods
Write addTranslation() and addRotation() first. These should add a TranslationAnimation or RotationAnimation to the appropriate array.
Write getMaxTime() next. This should examine all the animations in the class and return the maximum ending time. This is therefore the total length of the entire animation sequence.
Write playOn() last. This is the final method of the project! This method should act similarly to the playOn() methods in the animation classes, but it can’t just call them directly. The reason is because we need the animations to all run simultaneously if they overlap in time.
So the strategy to use here is to write a loop, similar to the ones in the animation classes that iterates through the a time variable by 20 millisecond increments. Then, inside that loop, we will have two other loops that iterate through the translation animations and the rotation animations, checking each one to see if we should advance to the next frame of the animation. Follow the pseudocode in the method.
When you’re all done, you should be able to run the testFullAnimation() test case, and it should reproduce the video at the top of this project.
What to turn in
- Through Canvas, turn in all your
.javafiles.
Additionally, upload a text file answering the following questions:
- What bugs and conceptual difficulties did you encounter? How did you overcome them? What did you learn?
- Describe whatever help (if any) that you received. Don’t include readings, lectures, and exercises, but do include any help from other sources, such as websites or people (including classmates and friends) and attribute them by name.
- Describe any serious problems you encountered while writing the program.
- Did you do any of the challenges (see below)? If so, explain what you did.
- List any other feedback you have. Feel free to provide any feedback on how much you learned from doing the assignment, and whether you enjoyed doing it.
Challenges
Add other types of animations, such as growing or shrinking a polygon (scaling it up or down), or a combination translation/rotation animation that does both at the same time (this would be necessary, for example, for an animation of a bicycle wheel that rolls along the ground, because it is simultaneously rotating and being translated).
Create an animation of your choice, similar in complexity to the full animation at the end of this project. Points will be given for creativity and complexity!