Jupyter Notebooks
We will be using Jupyter Notebooks in this class as a way to explore machine learning concepts, complete in-class activities, and work on projects.
Getting started
If you are familiar with Jupyter notebooks, you can use whatever environment you want to run them. If you are not familiar with them, there are a few ways to get started.
Lightning.ai notebooks in the cloud (easiest)
If your laptop or computer is not very powerful, lightning.ai will give you access to CPUs/GPUs in the cloud to use.
Steps:
- Go to lightning.ai and sign up for a free account.
- Go to https://lightning.ai/kirlinp/studios/comp375-student-env and click “Open in free Studio.”
JupyterLab Desktop (easiest, but you will need a decent computer)
If you don’t already have a Jupyter notebook environment installed, this is what I recommend to get started. This will install a Jupyter notebook environment that runs as a standalone application.
Download the installer:
Once you have downloaded and installed JupyterLab Desktop, run it how you would normally run applications on Mac or Windows.
Run JupyterLab through Anaconda (2nd-easiest)
If you have an Anaconda distribution of Python already downloaded and installed, you already have JupyterLab:
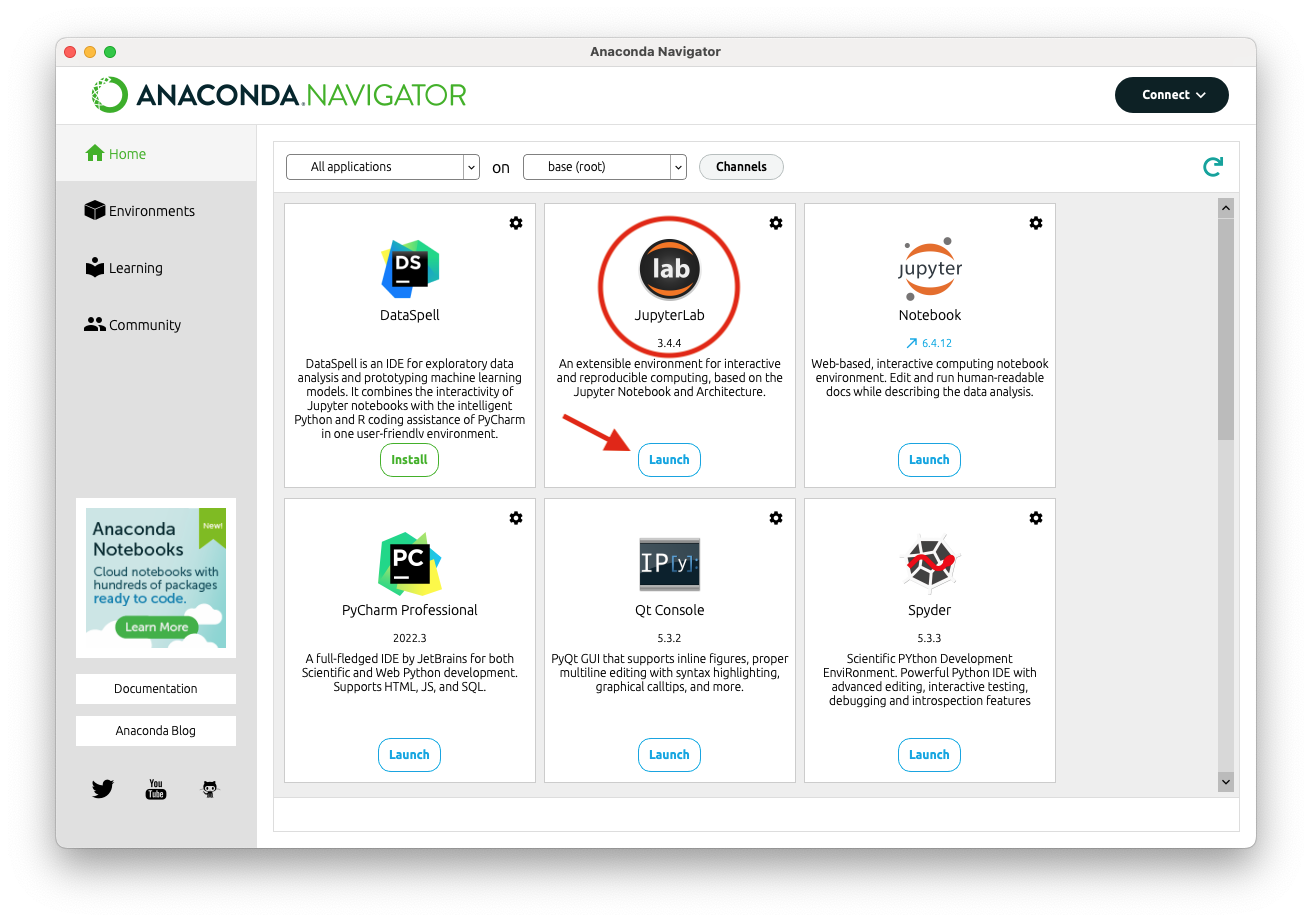
- Open Anaconda Navigator. Find JupyterLab and click Launch.

- Note: You can use the link to “Notebook” rather than JupyterLab, but the interface is not as nice.
Run JupyterLab through the command line
If you feel comfortable at the command line and have a working Python installation, you can install Jupyterlab using one of these methods:
- Via
pip:pip install jupyterlab
- Via
conda:conda install -c conda-forge jupyterlab
Run JupyterLab with the command jupyter-lab.
Getting the notebooks for class
I will distribute notebooks for class via Git. If you haven’t used or Git or Github before, that’s ok!
If you are using the lightning.ai notebooks in the cloud, launch the VSCode IDE, and go to the Source Control toolbar along the left side of the screen. Once there, look for the three horizontal dots, click then, and choose “Pull” from the menu that appears. This will sync your environment with mine.
If you are running the environment on your own laptop, here’s the easy way to get set up:
- Download Github Desktop and install it: https://desktop.github.com/
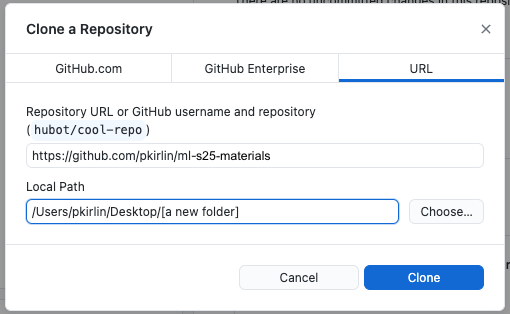
- Run the program and choose File -> Clone Repository.
- Choose “URL,” then enter
https://github.com/pkirlin/ml-s25-materialsfor the repository URL. - Under “Local Path,” click “Choose…” and find a place on your computer you want to store your notebooks for this class. I recommend creating a new folder for this.
- Then Click “Clone.”

- Choose “URL,” then enter
- This will download a number of notebooks into the folder you chose.
Updating the repository
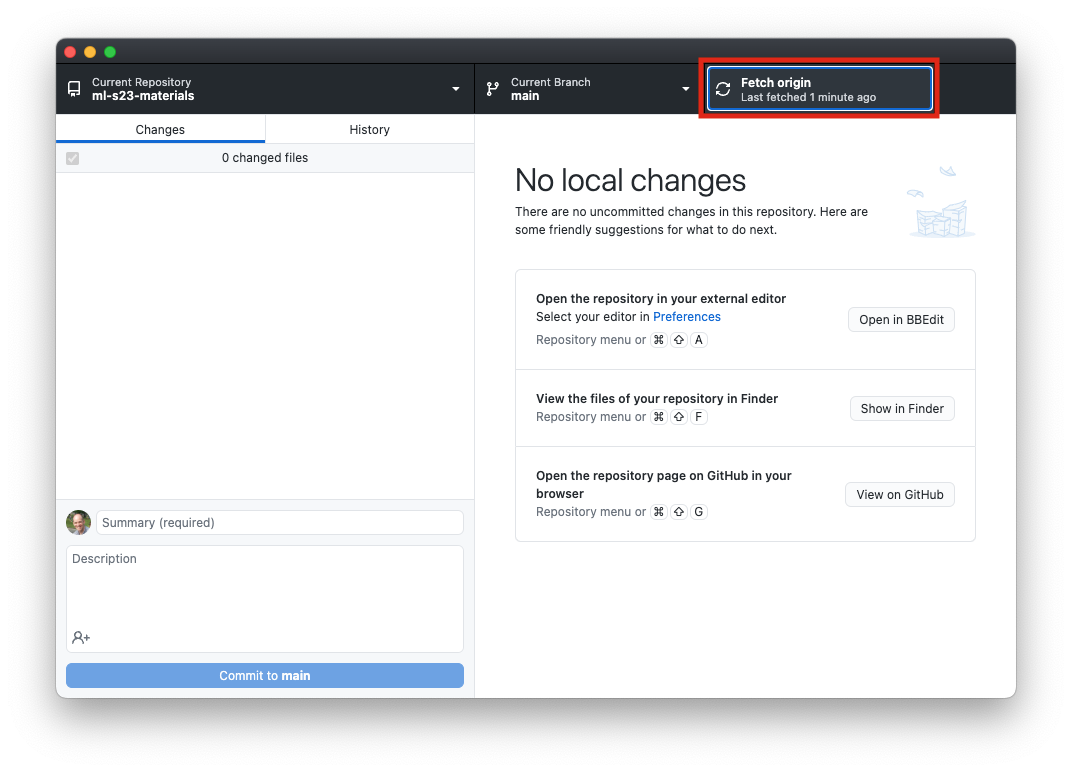
- There will frequently be new notebooks for you to download. The easiest way to update them is:
- Open Github Desktop and choose “Fetch origin” from the toolbar area at the top:

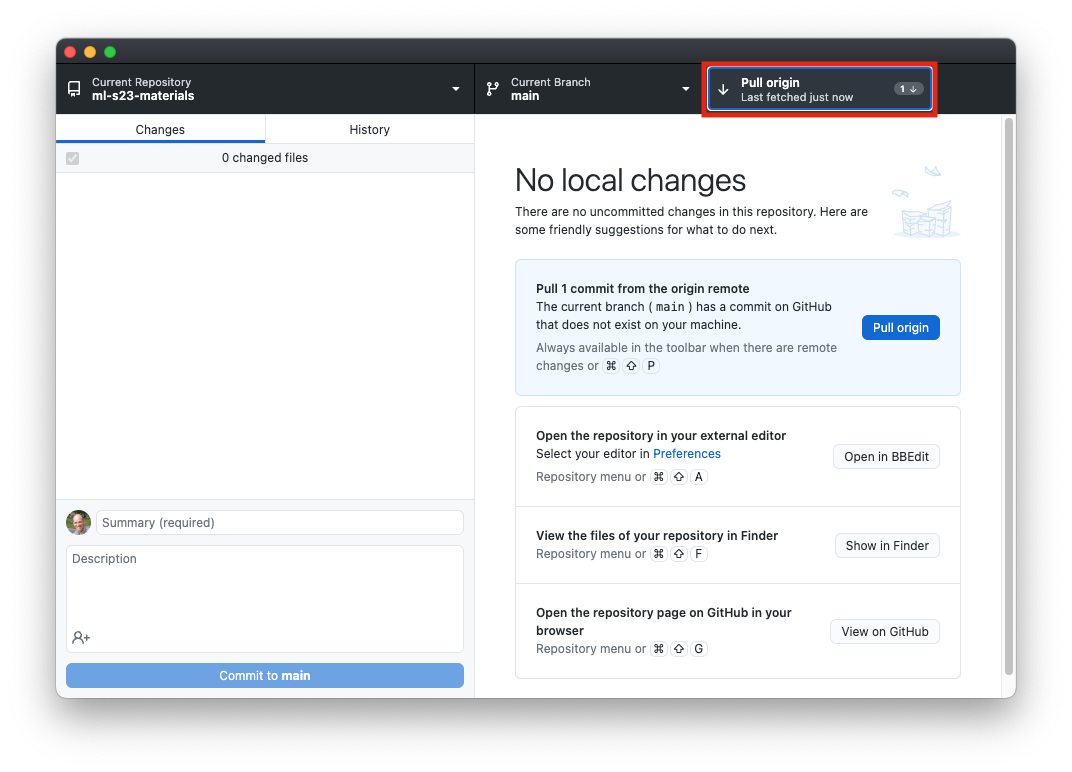
- Once you do that, if there are updates you haven’t downloaded yet, the button will change to “Pull origin,” and you can click it again to download the new notebooks.
